A crisp, clean border is the secret to making any lawn look professionally maintained. Lawn edger and trimmer define boundaries between your grass, flower beds, driveways, or walkways turning a regular yard into a showpiece.
Beyond aesthetics, learning how to edge a lawn makes mowing easier, keeps grass from creeping into unwanted areas, and helps with long-term weed control. Whether you’re a beginner or an experienced gardener, mastering this technique brings out the full beauty of your landscape.
In this comprehensive guide, we’ll walk you through everything about how to edge a lawn from tools and preparation to professional edging tips and introduce you to Yarbo’s Trimmer Module, a cutting-edge (literally) robotic solution that delivers perfect borders with zero manual effort.
Table of Contents:
What Is Lawn Edging?
Lawn edging is the process of creating a defined boundary between your lawn and adjacent areas. This not only makes your yard look tidy but also helps guide your mowing patterns and prevents grass from spreading into flowerbeds or pavement cracks.
A properly edged lawn:
-
Enhances curb appeal
-
Makes mowing faster and neater
-
Reduces weed spread
-
Gives your yard a structured, manicured look
.png?w=1280&h=720)
Types of Lawn Edging
When it comes to lawn edging, there are several types to choose from, each with its own unique benefits and aesthetics:
1. Natural Edging
Using a spade to create a clean edge in the soil provides a seamless look. This method is cost-effective and blends well with natural landscapes but may require regular maintenance to keep the edges sharp.
Pros: Cost-effective, simple to create
Pros: Cost-effective, simple to create
Cons: Requires regular touch-ups to stay sharp
2. Concrete and Stone Edging
Durable and versatile, these materials add a sophisticated touch to your lawn. They are long-lasting but can be more expensive to install.
Pros: Extremely durable, long-lasting
Cons: More expensive and labor-intensive to install
3. Metal and Plastic Edging
Lightweight and easy to install, metal and plastic options are great for modern landscapes. They are low-maintenance but may not be as durable as other materials.
Pros: Lightweight, low-maintenance, quick setup
Cons: May shift or warp over time with temperature changes
4. Wooden Edging
Rustic and charming, wooden edging works well in gardens with a natural theme. It blends beautifully with organic elements but may require periodic treatment to prevent rot and insect damage.
Pros: Aesthetic and eco-friendly
Cons: Prone to rot unless treated regularly
Pros and Cons of Each Type
Choosing the right type of lawn edging depends on your specific needs and preferences. Here’s a breakdown of the pros and cons of each type:
-
Durability: Concrete and stone last longer but can be costly. Metal and plastic are less durable but more affordable. Wood requires regular maintenance to withstand weather conditions.
- Aesthetic Appeal: Wooden and natural edges blend well with organic landscapes, while concrete and stone offer a more formal look. Metal and plastic can provide a modern, clean appearance.
- Maintenance Requirements: Plastic edging is low-maintenance, while wood and natural edging may need more frequent upkeep. Concrete and stone are generally low-maintenance once installed.
Choosing the Right Edging Material
The right choice depends on your yard’s design and maintenance goals.
-
For low-maintenance: Choose metal or plastic.
-
For premium looks: Go for stone or concrete.
-
For a natural vibe: Stick with wood or natural edges.
If you want the clean finish of a pro lawn service without hiring one automated trimming solutions like Yarbo’s Trimmer Module now make it possible.
Tools Required for Lawn Edging
To achieve clean and precise edges, you'll need the right tools:
Manual Tools
-
Spade or Edging Shovel – great for precision work.
-
Half-Moon Edger – ideal for small areas or curved edges.
-
Hand Trimmer or Shears – to refine and neaten edges.
Powered Tools
-
String Trimmer – for quick edge maintenance.
-
Lawn Edger – a powered wheel-guided tool for straight lines.
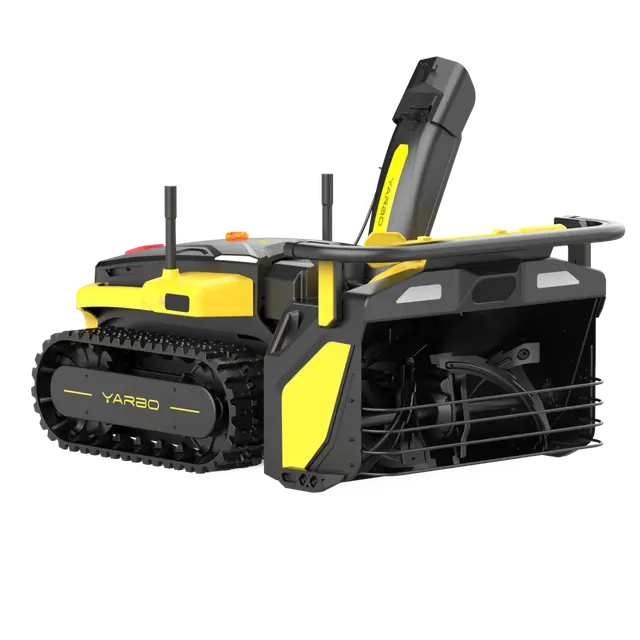
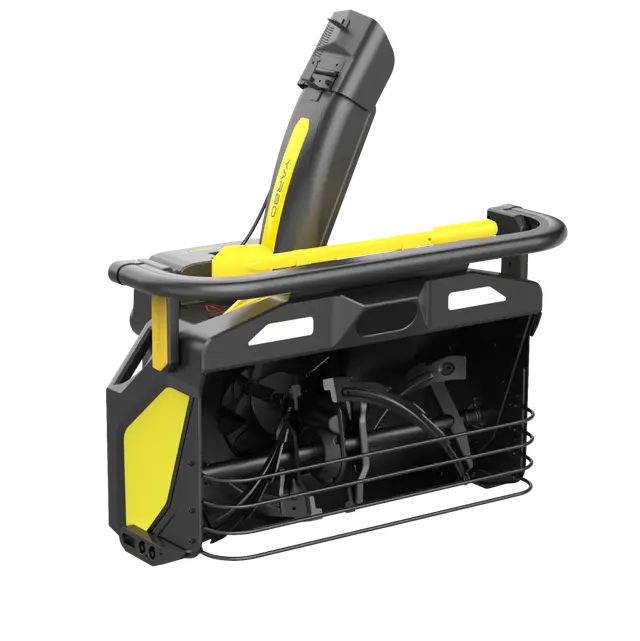
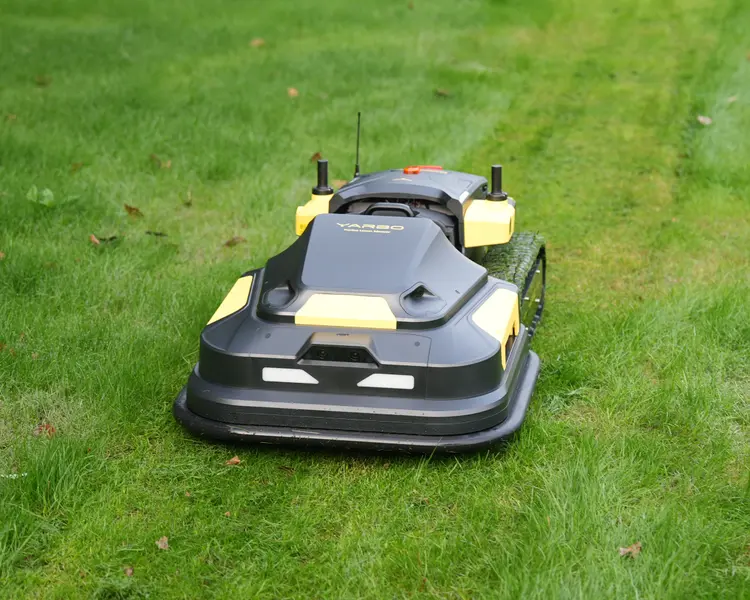
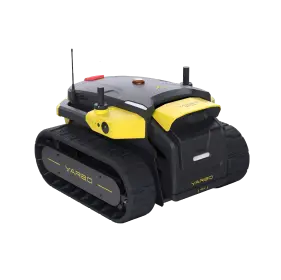
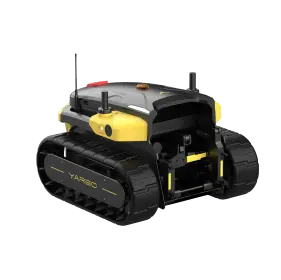
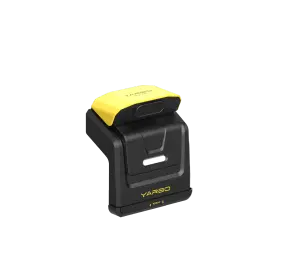
Yarbo Trimmer Module (Autonomous Edging Solution)
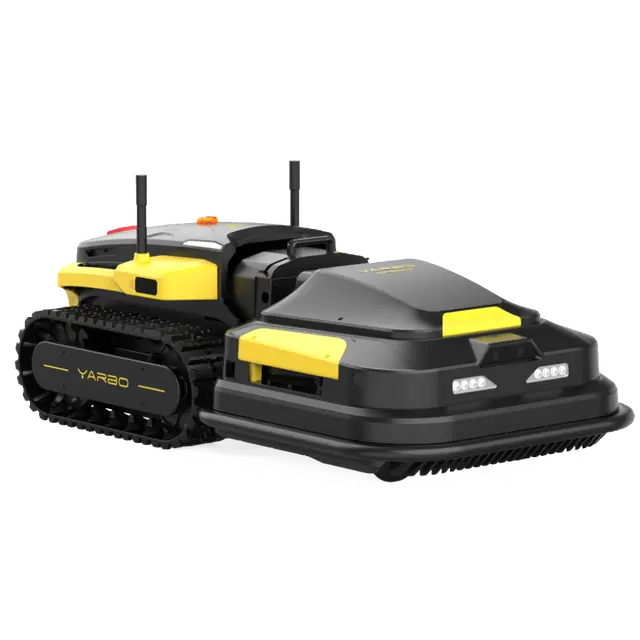
For homeowners who want precision without the labor, the Yarbo Trimmer Module is a revolutionary lawn edger and trimmer tool. It’s part of Yarbo’s modular robotic system designed to autonomously mow, blow snow, and trim edges using the same base unit called the Yarbo Core.

Key features include:
-
Autonomous Edge Trimming: Cuts precisely along borders and fences using intelligent path tracking.
-
Floating Structure: Adapts to uneven terrain for consistent results.
-
Adjustable Trimming Height: 2–4 inches for flexible edge control.
-
Automatic Line Feed: Keeps the trimming line at optimal length.
-
Obstacle Avoidance: Spring-loaded design helps it retract safely around objects.
-
Quick Detach System: Tool-free removal for easy cleaning or maintenance.
With Yarbo’s lawn edger and trimmer module, you can achieve crisp, professional edges without any manual effort, all while keeping your yard looking freshly groomed.
How to Properly Edge a Lawn?
Initial Preparation: Survey the area where you'll be working. Remove debris like rocks or sticks that could interfere with the edger. If the ground is dry, lightly water it to reduce dust.
Positioning the Edger: Place the wheel on a stable surface next to the edge you plan to cut. Adjust its height so it barely skims the ground for consistent depth.
Aligning the Edger: Use the alignment sight to ensure it’s perfectly straight along your desired edge.
Check All Settings: Double-check mechanical settings—ensure the throttle and blades are functioning correctly.
Safety Check: Wear all necessary safety gear (as mentioned earlier) before starting.
Read the Manual: Always read the product instruction manual before using any new tool. It ensures safe operation (preventing accidents), efficient use (mastering controls), proper maintenance (extending lifespan), and warranty compliance.
Use a garden hose, string, or spray paint to outline the boundary you want to edge. This ensures precision and helps visualize the final result.
Step-by-Step Guide to Lawn Edging
Now that you're prepared, let’s get to work!
-
Marking the Area
Use a sharp edging tool (spade, half-moon edger, or powered edger) to cut along the marked boundary. Press firmly for a clean line.
-
Handling Tough or Overgrown Areas:
-
Start slowly to gauge thickness.
-
Use multiple passes for control.
-
Clear debris after each pass for better visibility.
-
Installing Edging Material (if applicable):
Place stones, bricks, or other materials along the cut edge. Ensure they’re tightly fitted and partially embedded in soil.
-
Finishing Touches
Fill gaps with dirt or sand, tamp down soil around materials, and rake for smoothness.
-6.png?w=711&h=403)
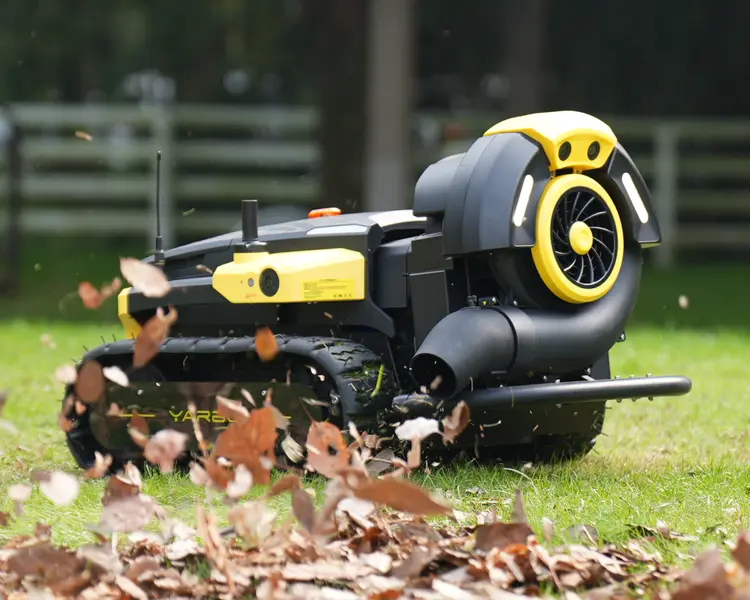
How to Edge a Lawn With Yarbo’s Trimmer Module?
If you’re using Yarbo’s robotic system:
-
Attach the Trimmer Module to the Yarbo Core.
-
Map the boundary via the app or existing yard layout.
-
Set trimming height (between 2–4 inches).
-
Activate edge routine: Yarbo automatically follows the perimeter.
-
Monitor first runs to ensure accuracy.
-
Clean and inspect the trimmer head regularly for best performance.
This system ensures even, clean edges around paths, fences, and driveways — no cords, no manual guiding.
What to Do with Debris After Edging?
After edging, clean up debris for a pristine finish:
-
Rake Large Debris: Collect larger pieces first.
-
Blow Away Residue: Use a blower or broom for smaller particles.
-
Dispose Properly: Bag debris and follow local disposal guidelines.
Safety Tips While Edging
Safety is paramount when using any lawn care equipment:
-
Wear Protective Gear: Sturdy boots, gloves, safety glasses, hearing protection.
-
Turn Off When Approached: If someone approaches while you’re working, turn off the edger immediately to prevent accidents and allow clear communication.
-
Be Aware of Surroundings: Watch for children, pets, or other obstacles.
Common Lawn Edging Mistakes
Avoid these pitfalls for professional results:
-
Over-Edging: Cutting too deep can damage the lawn, it can harm your grass roots which can lead to decoration of the grass from that area as well as dead grass patches as well.
-
Uneven Borders: Always use a guide for uniformity as uneven borders can ruin the aesthetic appeal of even a very well-maintained lawn.
-
Ignoring Lawn Growth Patterns: Adjust edges to accommodate growth over time.
Tips for Professional-Looking Lawn Edging
-
Keep edges consistent in depth and width.
-
Blend edges with your landscape design.
-
Add decorative touches like gravel or flowers.
-
Experiment with curvy edges or patterns for character.
-
Combine materials like stones and plants for a layered effect.
DIY vs. Professional Lawn Edging
-
DIY: Perfect for small, straightforward projects.Or if you are DIY junkie and have the time and will to experiment with your lawn. You can use Pinterest to find inspiration to play around with things.
-
Professional: Best for large or complex designs requiring expertise, they are experts for a reason. All you need to do is share your visions and budget with them and they will handle the rest.
- Hybrid Option: Use advanced tools like Yarbo’s lawn edger and trimmer module for professional results without hiring help.

Conclusion
Learning how to edge a lawn is a small task that makes a massive difference in your yard’s overall appearance. Whether you’re sculpting soft curves or defining bold lines, proper edging enhances your property’s structure and curb appeal.
For those ready to take their lawn maintenance to the next level, the Yarbo lawn edger and trimmer module is the ultimate upgrade — offering autonomous, precise, and consistent edging around your entire lawn. Combined with Yarbo’s modular system, you can mow, trim, and clear with one intelligent platform.
Experience next-level lawn care. Visit Yarbo’s official website to learn more about the Trimmer Module and other smart yard innovations.
FAQs
1. What is the easiest way to edge a lawn?
The simplest method is using a half-moon edger or a string trimmer for small lawns. For larger yards, Yarbo’s Trimmer Module automates the entire process.
2. How often should I edge my lawn?
Every 2–3 weeks during the growing season helps keep edges crisp and clean.
3. Can I edge my lawn without tools?
You can manually define borders with a garden trowel, but for best results, use proper edging tools or robotic solutions.
4. How does Yarbo’s Trimmer Module work?
It attaches to the Yarbo Core and autonomously trims along predefined edges using sensors and intelligent path tracking, with adjustable height and obstacle avoidance.
5. What’s the benefit of robotic edging?
Robotic systems like Yarbo save time, reduce manual labor, and ensure consistent, professional-grade borders every time.
6. How can lawn edging improve property value?
Clean edges enhance curb appeal and make your property look well maintained — a subtle but powerful boost in perceived value.
-7.png?w=1001&h=621)
 Private group · 33.0K members